

Cyberpanel is a modern and free control panel loaded with features. It’s a great alternative to cPanel or Plesk. In fact, it outshines other open-source control panels like Virtuamin, VestaCP, CentOS Web Panel, etc. It works on top of the OpenLiteSpeed server. Apart from installing normal applications like WordPress, Joomla, Magento, Prestashop it also features email marketing application like Mautic. Some of the features of cyberpanel are
- In built Email Marketing Section
- Docker Containerization
- Auto SSL
- Outofbox WordPress installation
- Email List Verification
- Multi PHP
- Easy backup
- File Manager
- Incremental backup
- Firewall/Security
- FTP server etc.
In this article, you will learn to install CyberPanel on Ubuntu 20.04. You will also learn to create a WordPress website on CyberPanel.
- Requirements for CyberPanel
- Installing CyberPanel
- Creating and Updating Nameservers for main domain
- Installing and Enabling SSL
- Installing WordPress
Requirements for CyberPanel
- A domain name from Godaddy or Namecheap
- A VPS or cloud with atleast 1 GB RAM. I am using Contabo in this demonstration. I have prepared list of VPS with open port 25, just in case you want to provide emailing to your customers as well.
Though CyberPanel recommends getting a minimum of 1 GB of RAM, I highly recommend you to get at least 2 GB RAM. This will save you from trouble later.
I already have a video lecture on how to purchase VPS from Contabo, that you can follow to buy the VPS.
Installing CyberPanel
Installation of cyberpanel is pretty straightforward and no brainer. All you need to do is run a single command to install it. But before that you should update Ubuntu.
Connecting to Remote VPS
Once you have the IP address, username, and password for the VPS, first of all, connect to remote VPS. If you are on a Windows machine you will need a special SSH client called Putty or BitVise. Linux and Mac user can open their terminal.
First of all switch to root user
1 | sudo -i |
The next step is to update the OS.
1 | apt update -y |
After that upgrade the packages using the following command.
1 | apt upgrade -y |
Now next command will begin the installation of CyberPanel.
1 | sh <(curl https://cyberpanel.net/install.sh || wget -O - https://cyberpanel.net/install.sh) |
Following this, you will be asked a few questions, just answer them.
Here answer 1 obviously
Here also you have to answer 1, otherwise, you need a license to the enterprise version
In the above screen answer Y
Here, your answer should b N, unless you have remote MySQL. After that, you will be asked to press enter to continue.
Next, you will be asked to set a password. I usually set the password instead of choosing the other 2 options. Therefore answer s.
On the next screen type your password and enter
Next, answer Y to install Memcached and other PHP extensions. These will be required later.
Further, you will be asked whether you want to install the Redis process and its extension. Answer Y.
At last, you will be asked whether you want to set up a watchdog. I usually answer Y, even though this is in beta.
At the end of the installation, you will be given login credentials as follows. You will also be asked to restart the server. Answer Y to that.
Now open the first URL https://194.163.163.12:8090 in the browser and log in to CyberPanel.
Creating Website and Updating Nameservers
Now the first thing you should do is to login into the domain registrar and create hostnames. Also, know as custom nameservers or glue records. Usually, every domain registrar has a tutorial for this.
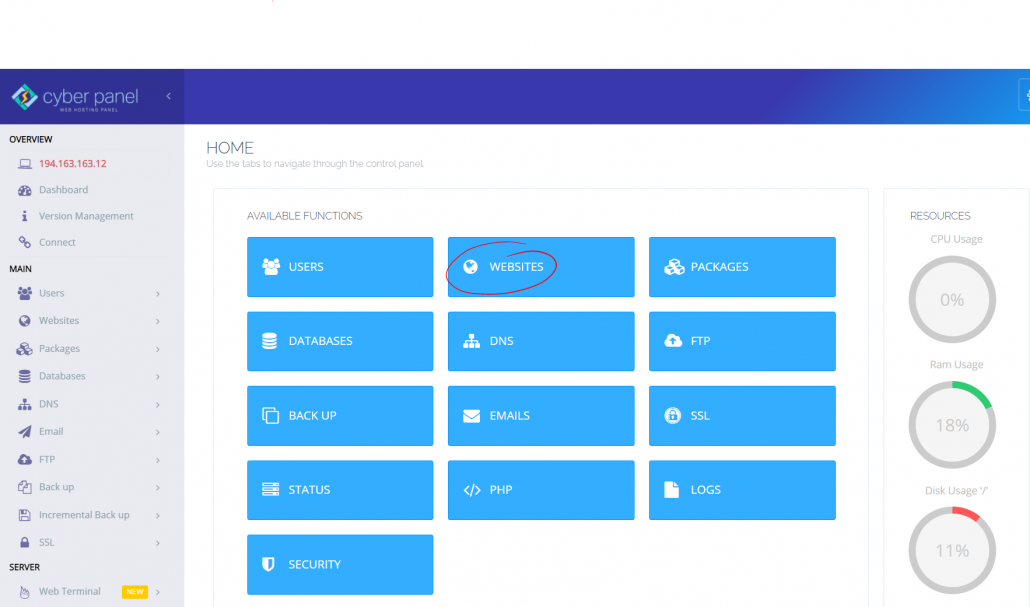
Next, open websites
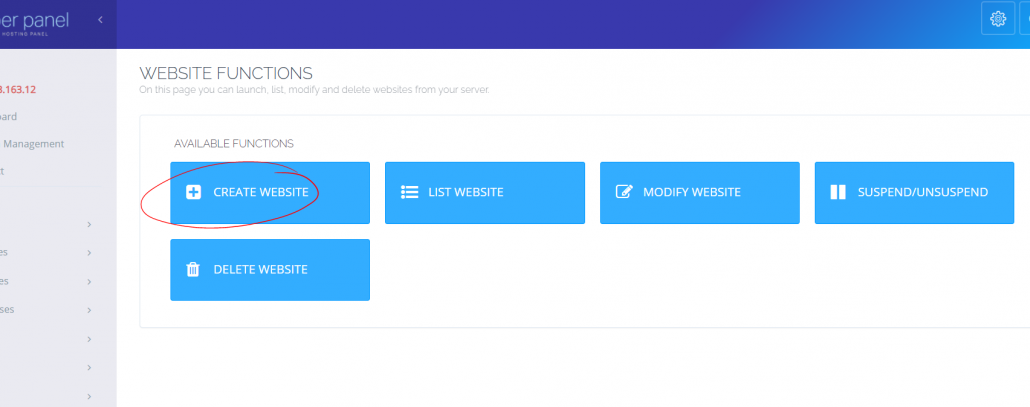
and then create a website
Now fill in the details like domain name, email, select PHP and check the required boxes. I usually check them all.
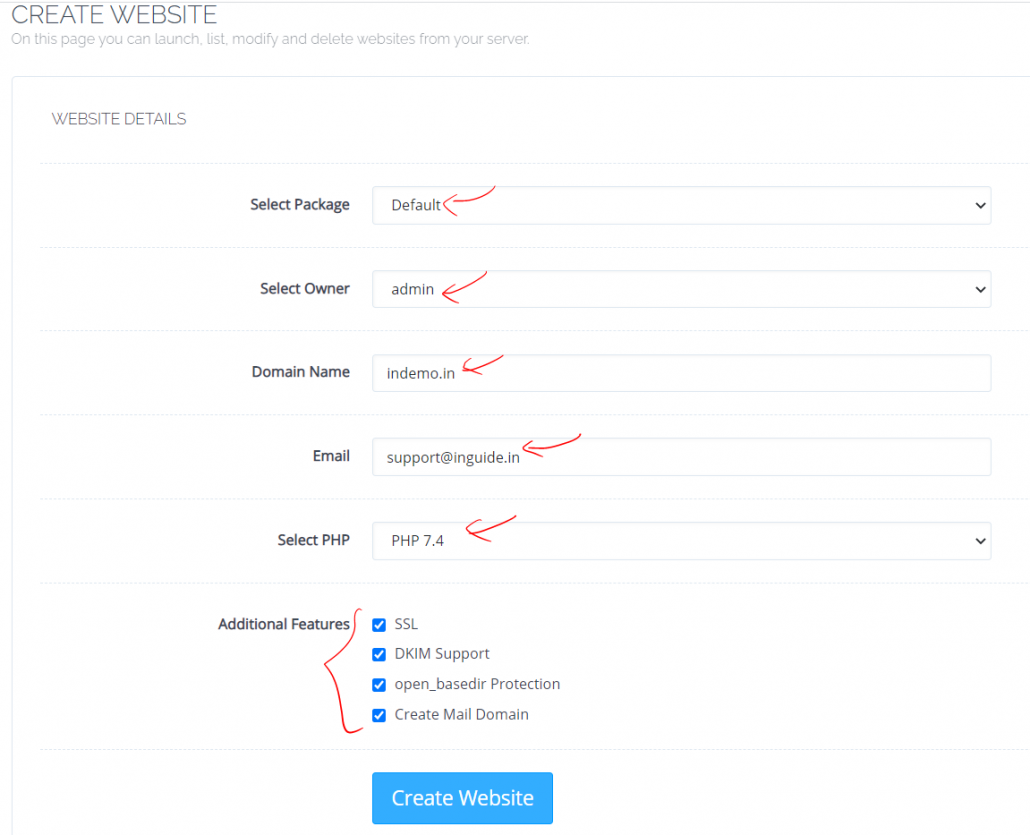
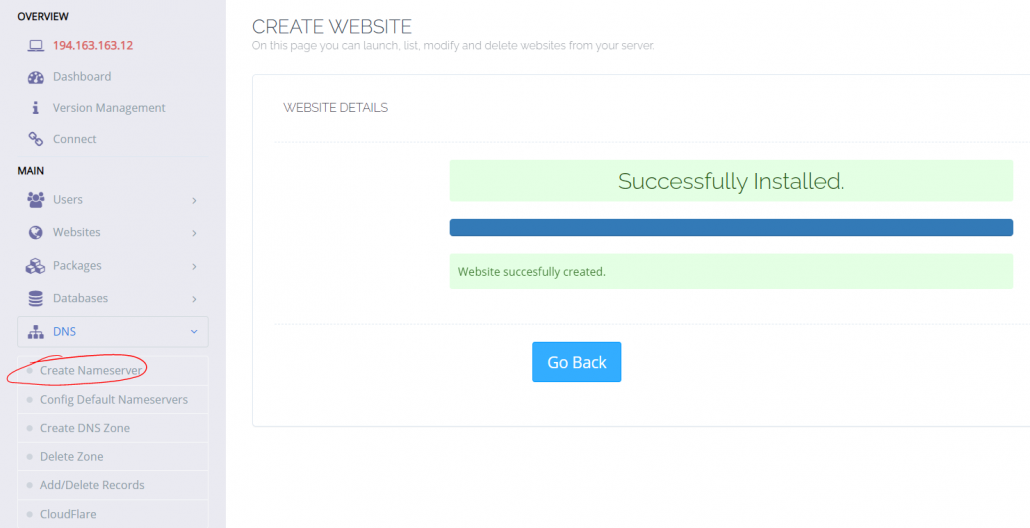
Click create a website and your website will be ready.
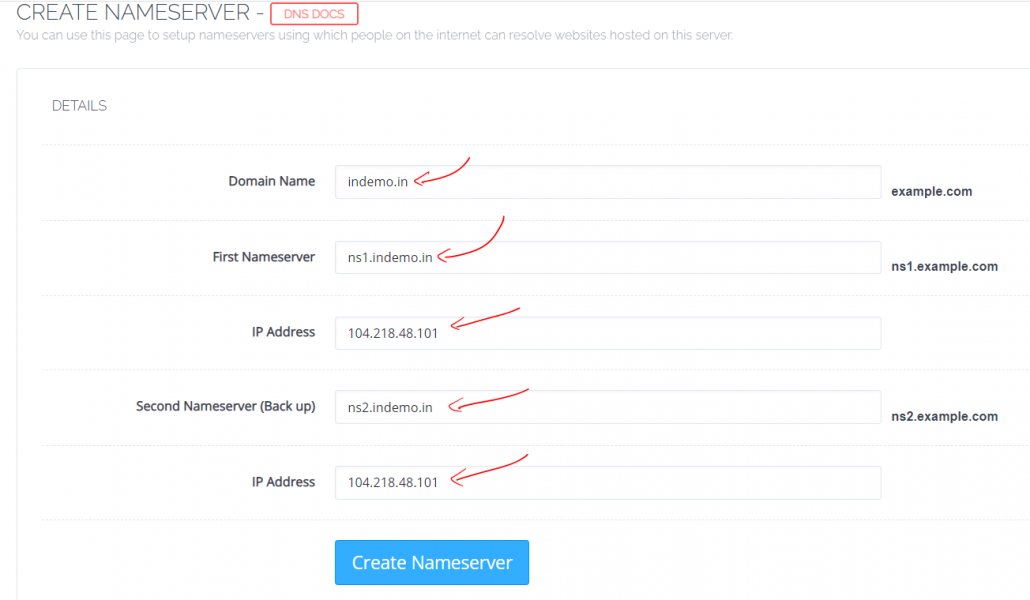
Now to create nameservers, go to Create Nameserver
Then, fill in the details as follows
Installing and Enabling SSL
To install SSL for both website and cyberpanel, go to SSL in left menu
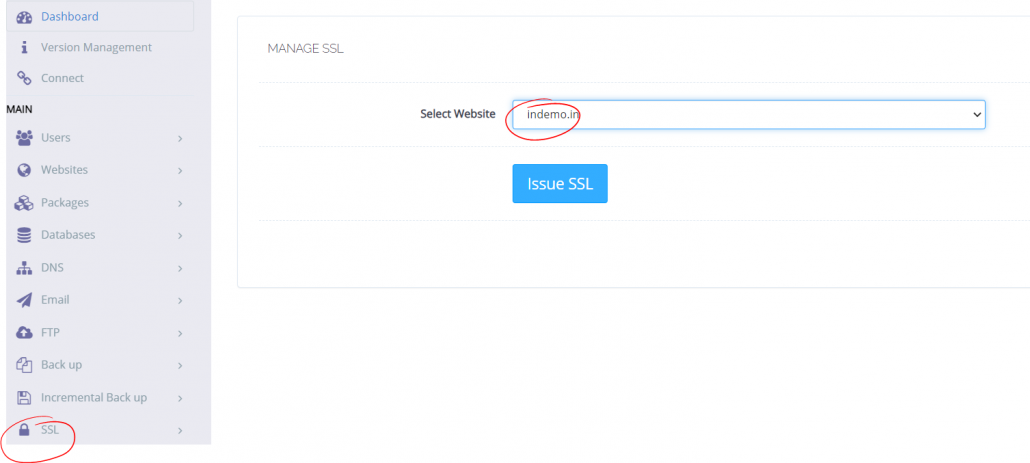
Thereafter select the type and click Issue SSL.
Installing WordPress
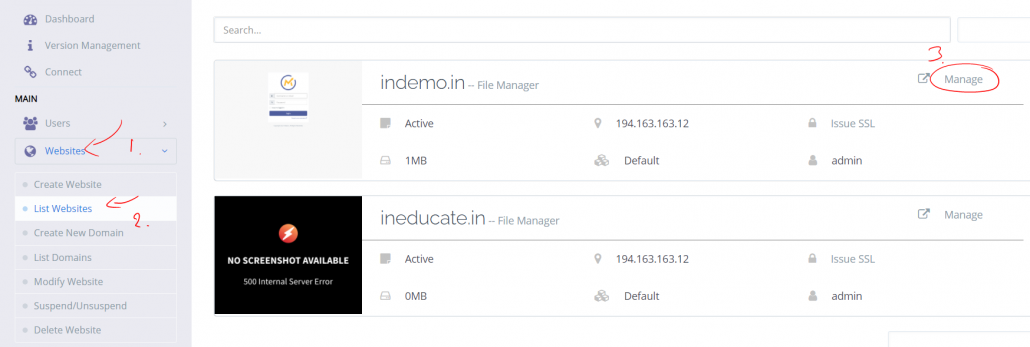
It’s super easy to install WordPress on CyberPanel. Go to the Websites in the left menu and then List Websites and then Manage
Now scroll all the way to the bottom. There you will find WordPress and other options.
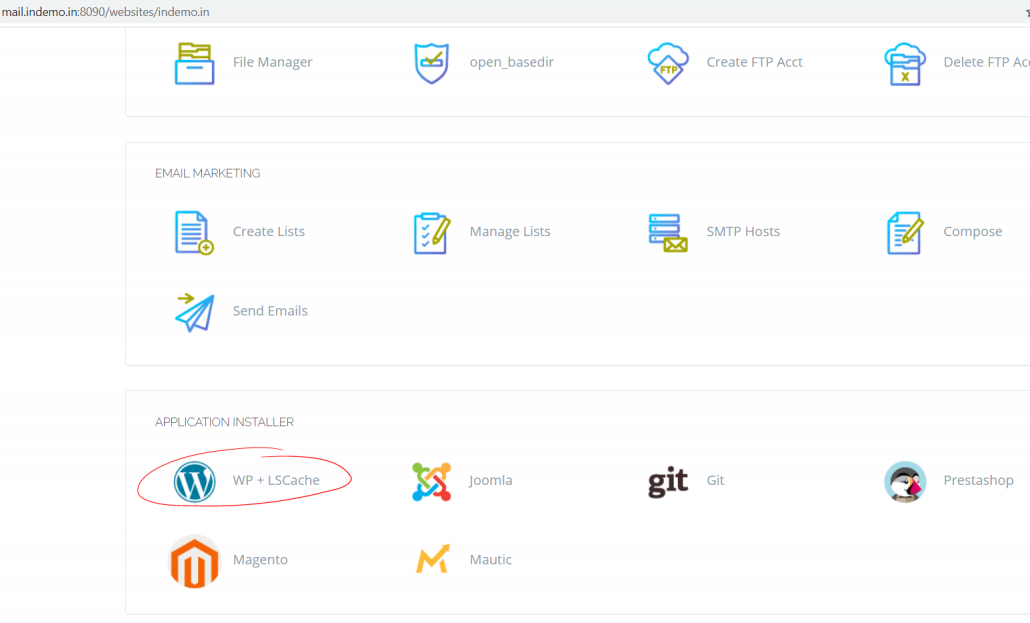
Fill in all the information asked for WordPress and click Install Now
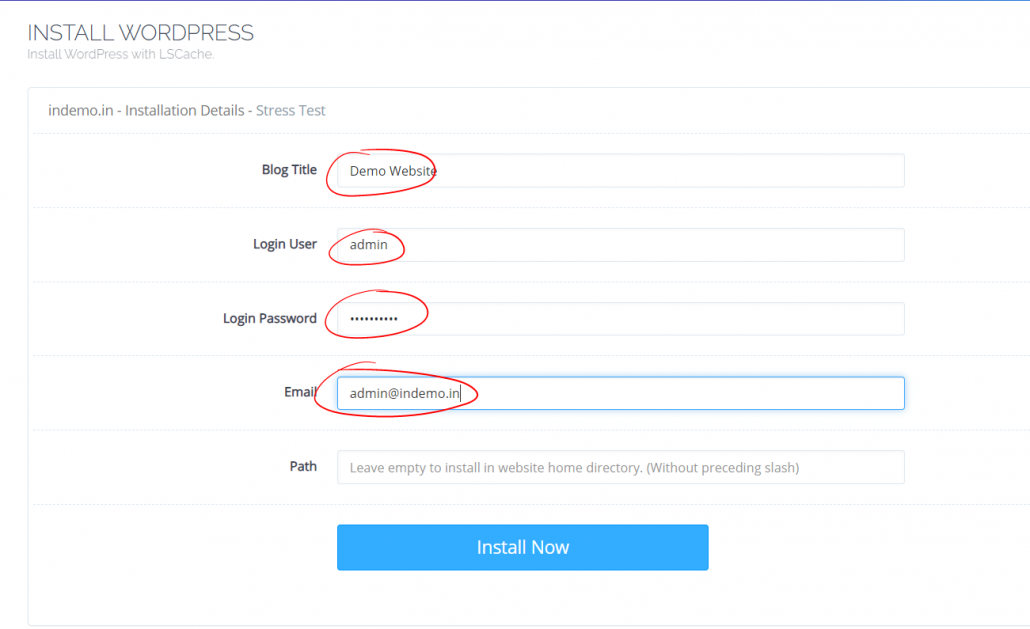
After installation, go to your URL to enjoy freshly installed WordPress on LiteSpeed server.
Conclusion
Installing Cyberpanel is easier than most Open source control panels. Also with a nice UI and modern look along with the best features cyber panel is the best in the market in my view.
Let me know what you think of CyberPanel in the comment box.