

Designed by The Email Marketing Hub.
Installing & configuring PowerMTA could be a daunting task for beginners. However, if you are in digital marketing especially email marketing you would be tempted to try PowerMTA once in a life. Therefore, I have came up with the simplest way to install PowerMTA step by step on CentOS 7/8.
Beginning
First of all, PowerMTA can be installed standalone as well as along with some control panels like VestaCP, CyberPanel, cPanel, Virtualmin/Webmin, CentOS Web Panel, Froxlor, etc. In another article, I already have discussed the installation of VestaCP. If you want to install PowerMTA on VestaCP you can follow it.
In this article, I will be talking about standalone installation. Let’s Begin.
Requirement for PowerMTA
- VPS or cloud or dedicated server with at least 2GB of RAM (recommended minimum 8GB). I am using Contabo in this demonstration. Install CentOS on the cloud.
Best and cheap VPS for email marketing - A domain name. I prefer to buy domain names from Namecheap, Godaddy.
- PowerMTA rpm file and license. You can get it from Sparkpost.
Environment Setup
First of all, you need to install a couple of software to connect/upload files to the server.
Connecting to server
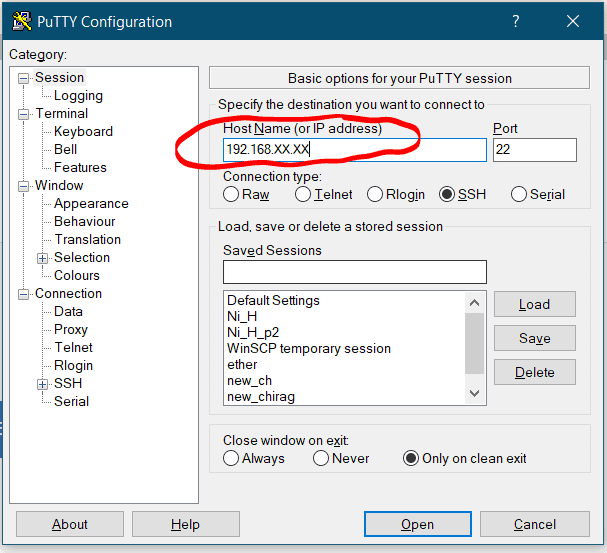
If you are windows then you will need a SSH client to connect to server. A simple and easy SSH client is putty
Open the putty and paste the IP address of your server
Enter the username, it could be root or anything else provided by your hosting.
Now enter the password. In order to paste anything on putty, use the right click of the mouse.
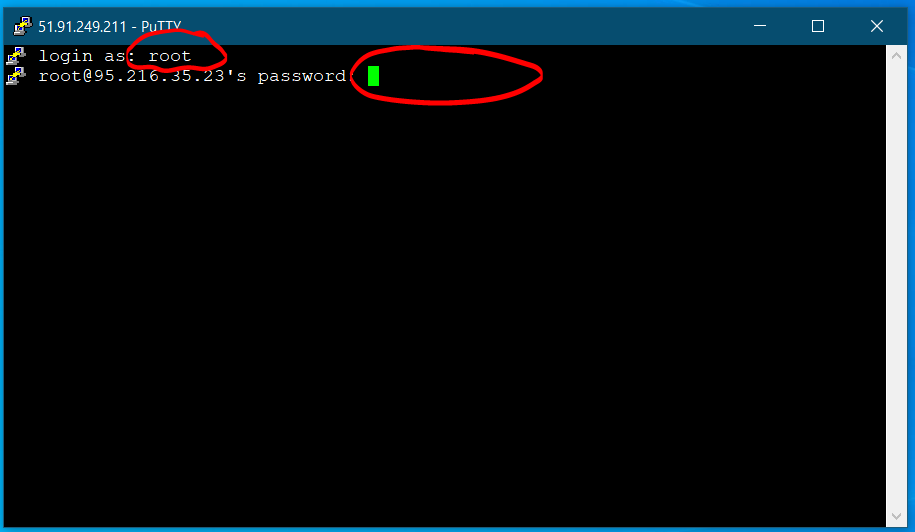
Note that password won’t be displayed, therefore you don’t have to right click again and again, just click once.
Checking port accessibilty
Nowadays most of the cloud service providers sell cloud/VPS with port 25 blocked. Unless port 25 is open emailing wouldn’t be possible from your server. Therefore, it’s a good idea to check if outgoing traffic is permitted on port 25.
Install telnet with following command
|
1
2
|
yum install telnet -ytelnet smtp.gmail.com 25 |
The output will be something like this

If you are not getting above result, this means port 25 is blocked for outgoing traffic or, in other words, your hosting provider has blocked port 25. You may want to request them to open port 25.
To exit the above command windows type
|
1
|
quit |
followed by enter.
VPS Setup
First of all you need to install CentOS 7/8 on VPS or cloud, which I already did on Contabo. If your hosting is different then make sure to select CentOS 7/8, when placing order.
Let’s update the CentOS
|
1
|
yum update -y |
After the update finishes off, set up the hostname as follows
|
1
|
hostnamectl set-hostname mail.yourdomain.com |
Don’t forget to replace yourdomain.com with your domain name. After that check, whether hostname is updated or not.
|
1
|
hostname |
You will see the output of hostname the following
- Domain Setup
Now we will set up the domain. Login to your domain registrar and create A record. Also, make sure you have MX record for your domain. If not then create one.
| Type | Name | Value |
| A | Your IP ADDRESS |
|
| MX | @ | mail.yourdomain.com |
In the MX record set the priority to 10.
Uploading the PowerMTA
Now it’s time to upload the rpm package and license to your cloud/VPS. For this purpose, you will need an FTP client like FileZilla or WinSCP.
After the upload, follow the next section for installation.
Installation and Configuration of PowerMTA
Now we have the rpm package on the server. Let’s check the content of current directory to make sure uploaded file exist in it.
|
1
|
ls -l |
Now, after verification, it’s time to install PowerMTA.
|
1
|
rpm -ivh PowerMTA.rpm |
Don’t forget to replace PowerMTA.rpm with your rpm package name.
Next step is to copy the license file to the /etc/pmta directory.
After this step it’s time to configure pmta so download the config file here.
Next, we are going to make changes in the configuration file on the PC itself. Open it in notepad or notepad++.
Replace the IP address and domain name.
Also, update the SMTP details to make them unique.
Now, before sending out first email, you need to create following DNS records.
- SPF record :
|
1
|
v=spf1 a mx a:yourdomain.com ip4:44.91.76.19 ~all |
- DMARC record: For _dmarc.yourdomain.com
|
1
|
v=DMARC1; p=none |
- rDNS record: To create rDNS record login to hosting and look for your server IP.
- DKIM record: Creating DKIM records is a little complicated. It’s been discussed in a separate article.
Testing of SMTP
Now after hard work, it’s time to test the server. Go to https://smtper.net and fill in the details as follows. Also, check out 10 tools to check the efficacy of your SMTP server.
| SMTP Host | mail.yourdomain.com |
| SMTP port | 2525 |
| Use authetication | Yes |
| Login | adminuser |
| Password | adminPassWord |
| Email From | test@yourdomain.com |
| Email to | testuser@gmail.com |
Let’s open Gmail to check whether an email has been delivered or not.
Voila! We successfully installed and configured PowerMTA.
Let me know in comment if you have any question. I will be happy to answer.